|
|
||
|---|---|---|
| data | ||
| docs | ||
| public | ||
| server | ||
| src | ||
| .gitignore | ||
| bun.lockb | ||
| docker-compose.yml | ||
| Dockerfile | ||
| eslint.config.js | ||
| Gruntfile.cjs | ||
| index.html | ||
| LICENSE | ||
| package.json | ||
| postcss.config.js | ||
| README.md | ||
| tailwind.config.js | ||
| tsconfig.app.json | ||
| tsconfig.json | ||
| tsconfig.node.json | ||
| tsconfig.server.json | ||
| vite.config.ts | ||
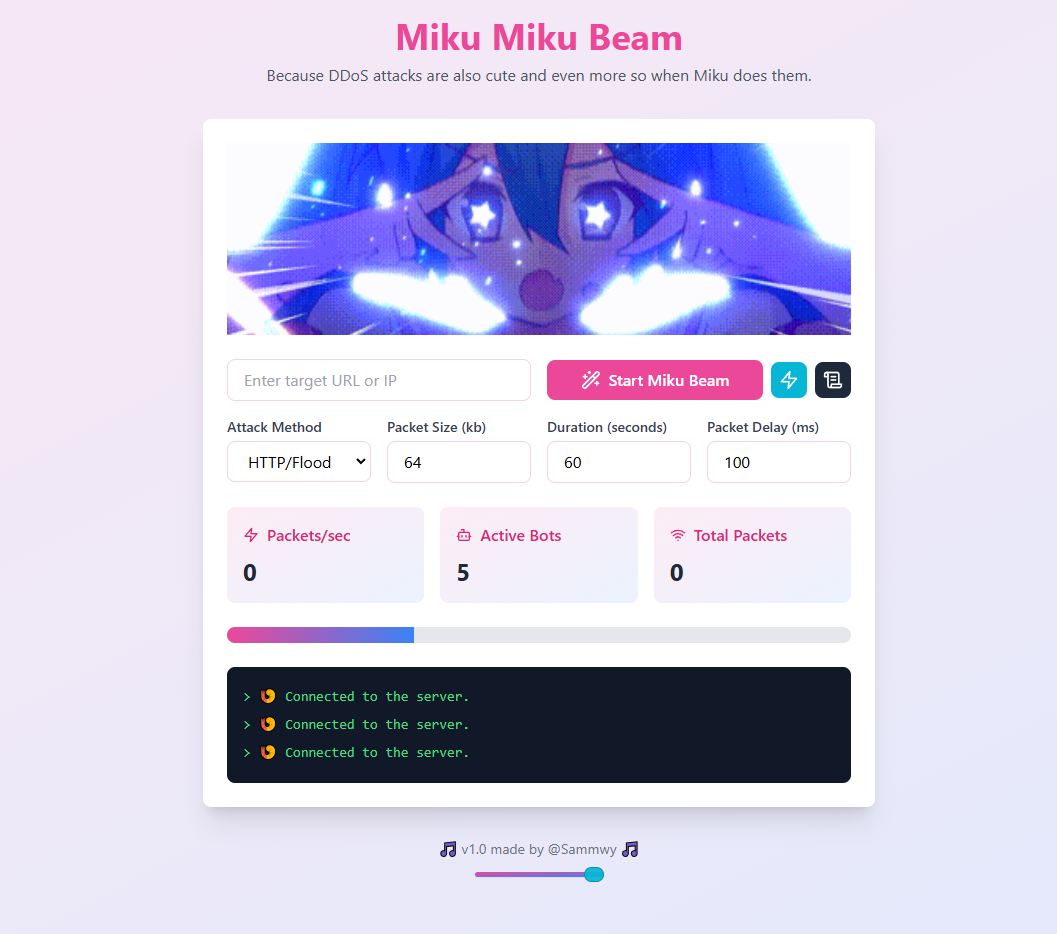
Miku Miku Beam 💥⚡ (Network Stresser)
A fun and visually appealing stress testing server with a Miku-themed frontend, where you can configure and run attacks while enjoying a banger song in the background! 🎤✨
Features 🎉
- 🐳 Docker Ready: MMB is ready to be built and run in a Docker container.
- 🌐 Real-time Attack Visualization: View your attack’s progress and statistics in real-time as it runs. 🔥
- 🎶 Miku-themed UI: A cute and vibrant design with Miku’s vibe to make the process more fun. Includes a banger song to keep you pumped! 🎧
- 🧑💻 Configurable Attack Parameters: Easily set the attack method, packet size, duration, and packet delay via the frontend interface.
- 🛠️ Worker-Based Attack Handling: The server processes attacks in separate workers for optimal performance and scalability.
- 📊 Live Stats: Track the success and failure of each attack in real-time. See how many packets are sent and whether they succeed or fail.
- 🖼️ Aesthetic Design: A visually cute interface to make your experience enjoyable. 🌸
- 📡 Attack Methods::
HTTP Flood- Send random HTTP requestsHTTP Bypass- Send HTTP requests that mimics real requests (Redirects, cookies, headers, resources...)HTTP Slowloris- Send HTTP requests and keep the connection openMinecraft Ping- Send Minecraft ping/motd requestsTCP Flood- Send random TCP packets
Setup 🛠️
Prerequisites 📦
Make sure you have the following installed:
- Node.js (v14 or above) 🌱
- npm (Node Package Manager) 📦
Development Mode 🔧
-
Clone this repository:
git clone https://github.com/sammwyy/mikumikubeam.git cd mikumikubeam -
Install the required dependencies:
npm install -
Create the necessary files:
data/proxies.txt- List of proxies.data/uas.txt- List of user agents.
-
Run the server in development mode:
npm run dev- The frontend runs on
http://localhost:5173. - The backend runs on
http://localhost:3000.
- The frontend runs on
Production Mode 💥
-
Clone the repository and navigate to the project directory:
git clone https://github.com/sammwyy/mikumikubeam.git cd mikumikubeam -
Install the dependencies:
npm install -
Build the project:
npm run build -
Start the server in production mode:
npm run startIn production mode, both the frontend and backend are served on the same port (
http://localhost:3000).
Don't forget to add the necessary files
data/proxies.txtanddata/uas.txt.
Usage ⚙️
Once the server is up and running, you can interact with it via the frontend:
-
Start Attack:
- Set up the attack parameters: target URL, attack method (HTTP Flood, Slowloris, TCP, etc...), packet size, duration, and delay.
- Press "Start Attack" to initiate the stress test.
-
Stop Attack:
- Press "Stop Attack" to terminate the ongoing attack.
Example Request
{
  "target": "http://example.com",
  "attackMethod": "http_flood",
  "packetSize": 512,
  "duration": 60,
  "packetDelay": 500
}
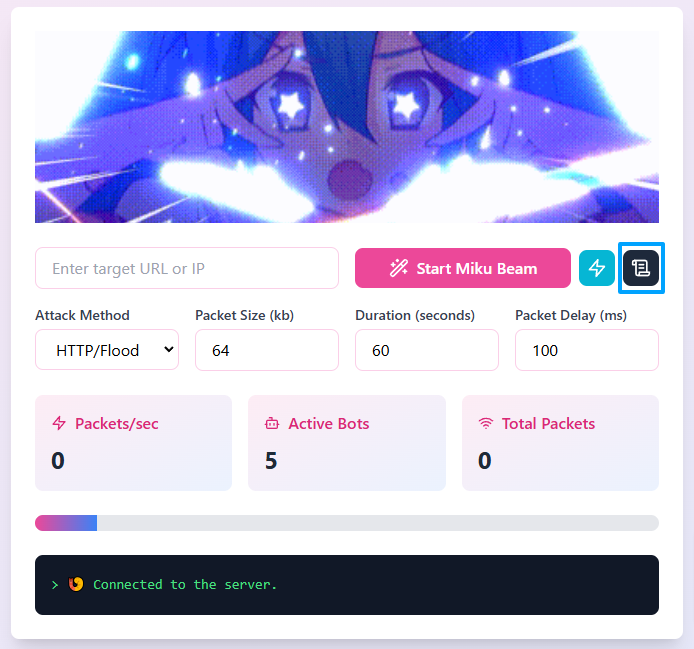
Adding Proxies and User-Agents
Access to the data/proxies.txt and data/uas.txt can now be done fully in the frontend. Click the text button to the right of the beam button to open up the editor.
Worker-Based Attack Handling 🔧💡
Each attack type is handled in a separate worker thread, ensuring that the main server remains responsive. The attack workers are dynamically loaded based on the selected attack method (HTTP, etc...).
To-Do 📝
-
Add more attack methods:
- UDP 🌐
- DNS 📡
- And more! 🔥
-
Enhance attack statistics and reporting for better real-time monitoring. 📊
Contributing 💖
Feel free to fork the repo and open pull requests with new attack protocols, bug fixes, or improvements. If you have an idea for a new feature, please share it! 😄
Adding New Attack Methods ⚡
To extend the server with new attack methods (e.g., Minecraft, TCP, UDP, DNS), you can create new worker files and add them to the server configuration.
For example:
- Add a new attack method in the frontend settings.
- Create the corresponding worker file (e.g.,
minecraftAttack.js). - Update the attack handler configuration to include the new method.
const attackHandlers = {
  http_flood: "./workers/httpFloodAttack.js",
  http_slowloris: "./workers/httpSlowlorisAttack.js",
  tcp_flood: "./workers/tcpFloodAttack.js",
  minecraft_ping: "./workers/minecraftPingAttack.js",

  // Add more protocols as needed!
  your_protocol: "./workers/yourProtocolAttack.js"
};
FAQs ❓
1. What operating system does MMB support?
Windows, Linux, Mac and Android (untested)
2. It crashes on startup, giving a "concurrently" error
Try running two terminals instead of one, in the first one use "npm run dev:client", and in the other one "npm run dev:server". (This happened to several people with Windows 11)
3. I go to "http://localhost:3000" and nothing appears.
Port
3000is the server port, to see the UI you must use port5173(http://localhost:5173)
4. Requests fail to be sent to the target server (Read timeout and variations)
You must put the corresponding proxies in the file
data/proxies.txt. On each line, put a different proxy that will be used to perform the attack. The format must be the following:
protocol://user:password@host:port(Proxy with authentication)protocol://host:porthost:port(Uses http as default protocol)host(Uses 8080 as default port)
License 📝
This project is licensed under the MIT License - see the LICENSE file for details.
Disclaimer 🚨
Please note that this project is for educational purposes only and should not be used for malicious purposes.